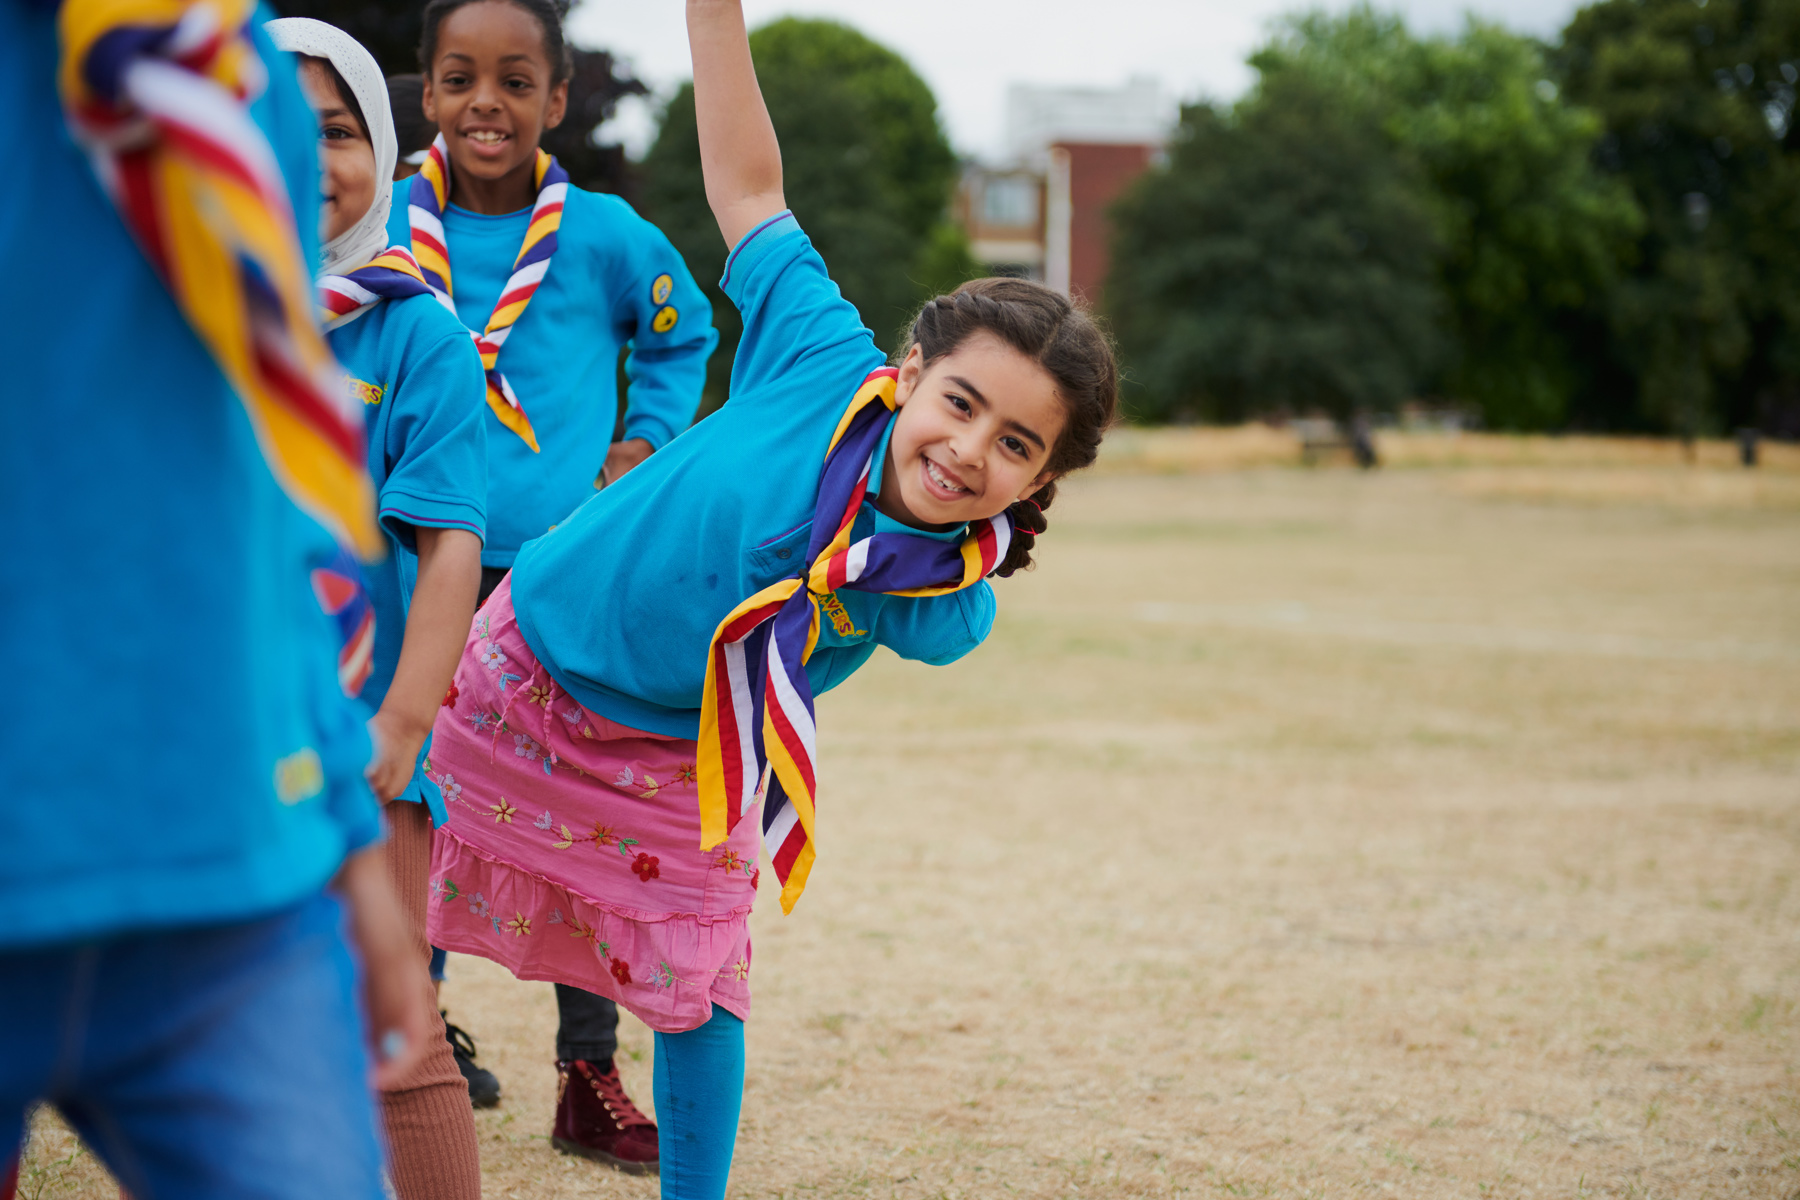
9 wide games to get everyone up and moving
From capturing flags to dodging dragons, there's plenty of fun to be had with our wide games.
Wide games are great to get young people moving, whether you’ve got a small or large group.
These games can be played outdoors or indoors, though you could always head to your local park if you want a bigger space to run and explore in.
So, fill up your water bottle and make sure your laces are tied, then get ready to have some fun with our 9 wide game ideas.
Find an area with plenty of safe hiding spaces, without people leaving the agreed boundaries.
Set up a hoop or mark out a space with cones for the farmer’s den. An adult volunteer or young leader can monitor the den to make sure sheep are arriving with another sheep.
Divide the group into sheep and shepherds. A fifth of the group can be the sheep and everyone else will be shepherds.
When the game begins, the sheep must hide in separate places, without seeing where each other hid.
Their goal is to find at least one other and go together to the farmer’s den, while avoiding capture by the shepherds. To help find each other, baa like a sheep as loudly as possible.
Sheep can't reach the farmer's den individually. Any individual sheep can leave the farmer's den once they've arrived there, but to get back into the den they need to be with at least one other sheep, who isn't already in the den.
Players acting as shepherds should close their eyes to give the sheep a chance to hide. When everyone’s ready, the shepherds can start looking for the sheep.
The shepherd’s goal is to round up and tag all the sheep. Once a sheep is in the den, you can't tag them. If any sheep leave the den, you can tag them. However, shepherds can't guard the farmer's den.
Once a sheep is caught (by being tagged), they should freeze and stay where they are. If they’ve been caught sheep can free another sheep by tagging them. Any individual sheep can leave the farmer's den to rescue and untag another sheep, but they may be caught too.
The sheep win if time runs out before all the sheep are caught or if all the sheep find each other and get back to the farmer’s den together. The shepherds win if all the sheep are caught before the time runs out.
If playing in a public space, young people playing the sheep should be paired up so no young person is left alone, and shepherds should search in pairs.
Mark out a large square in the middle of your space with tape, chalk or cones. This’ll be the rabbit warren.
Choose two players to start as foxes. Everyone else will start as rabbits.
The rabbits should spread out within the rabbit warren, while the foxes must stand outside the warren.
The foxes should get a soft ball each and their goal is to roll their ball at the feet of a rabbit to catch them. The rabbits should try to dodge the balls.
If a rabbit is hit with a ball below the knee, they become a fox. They should get their own ball to start catching rabbits with.
The game ends when there are no rabbits left in the warren.
Make sure the warren is laid out with enough space for everyone, including young people with mobility aids. If people may struggle to roll or pick up the balls, they could work with a friend to help them pick up the ball or to roll it together. The foxes could also be sat down to roll the ball and bigger or lighter balls, such as beach balls, could be used.
Split the group into two teams, then divide space into two areas (one for each team) with a line of tape, cones or chalk. Each team should get into their space and stand along the line, making sure they’re facing the other team. A team captain should be chosen from each team and stand behind their team.
There are three creatures to pick from, Giants, Wizards and Elves:
- Giants stand on their toes, raise their arms, and growl menacingly.
- Wizards crouch slightly, wave their magical fingers, and say spells.
- Elves crouch down low, cup their hands behind their ears, and squeak.
In this game, giants squash elves, elves outsmart wizards, and wizards zap giants.
To begin, each team turns and looks at their team captain. The team should decide together whether they’ll be giants, wizards or elves, without making it obvious to the other team. People could do the actions or whisper their choice. The team captain can help lead the decision.
When the person leading the activity says ‘go’, everyone should spin around and show which creature they’ve chosen to be.
The winning team gets one point. You can play as many rounds as you like. The winning team is the one with the most points at the end.
This game is like ‘Rock, Paper, Scissors’. You could play the game with the familiar actions of rock, paper and scissors if it’s easier for everyone. If you’re using the magical creatures, adapt the actions if needed to make sure everyone can do them.
Mark out your playing area with tape or chalk. Create a court space using six parallel lines, consisting of two start lines, two attack lines and two centre lines.
Divide everyone into two teams of about eight players. If there are more than 16 players, some people can be subs. Each team should stand behind their start line.
Place five balls in between the centre lines of the court. The two balls to the left of each team belong to them, the middle ball is neutral and can be taken by either team.
When the game starts, everyone can then run towards the balls, trying to collect the two balls belonging to their team, as well as claim the neutral ball.
As soon as players get back to their attack line, the balls become ‘live’ and players can throw or bounce a ‘live’ ball at the opposite team. A ball is live until it hits the floor, walls or surrounding area, when it’ll need to be taken back to the attack line again to be made ‘live’ again. Any ball that’s thrown that’s not taken back to the attack line doesn’t count.
Players must aim to hit each other beneath people’s shoulders.
If a player hits another player below the shoulders, that person is out. If a player throws the ball and the person they’re aiming at catches it before it bounces, the player who threw the ball is out.
Anyone who’s out must step off the court. But, if a player catches the ball before it bounces, a player from their team who’s out can re-join their team.
An adult volunteer or young leader should referee for each team. Play until a whole team is out or set a time limit where the game ends and the team with the most players left wins.
This game can also be played sitting down and all teams should be mixed ability. If anyone’s nervous about the ball coming towards them, it’s OK if they want to watch until they’re ready to join in.
Divide everyone into at least three equally sized teams.
Create a central nest, which could be a bucket or a circle made from cones.
Each team needs to make their own nest too, which could be a bowl or bucket. Each team’s nest should be the same distance away from the central nest. The team’s nests should be equally the same distance apart from each other too.
Give every player one token. For example, you could use counters, bouncy balls or cards as tokens. They’ll need to be the same colour. The players should put their token into their team’s nest.
Decide on another type of token, different to the ones given to players, such as a different coloured counter or card. Place these tokens into the central nest. These more exciting tokens are worth two points each, but must be collected by two people at a time.
The aim of the game is to get the most tokens in your teams’ nest. When the game starts, players should steal tokens from other teams’ nests, as well as the central nest, and bring them back to their own nest.
A team is ‘out’ if their nest becomes empty, even if it’s just for a few seconds. If a team wants to join back in when they become out, they can cause mischief by raiding other nests and return tokens to the central nest.
When there are only two teams left in play, the game can end. The winning team is the one with the most tokens in their nest!
Explain the following rules and give teams some time to discuss their tactics, before saying ‘go!’:
- No physical contact is allowed.
- Players can only carry one token at a time.
- Two players must work together if they want to take a more exciting token from the central nest or another group's nest and back to their own nest.
- Tokens can only be taken from a nest – not from a person carrying a token.
You can adapt the distance between nests to suit everyone in your group. Make sure the terrain is accessible for everyone. For example if any players use a wheelchair, you can play on a flat and even terrain. If anyone can’t bend down and reach nests on the floor, raise them by putting bowls on tables.
Mark out a jail by using hoops or cones. Divide everyone into two even teams. One team will be the hiders, while the other team will be the jailers.
The jailers should close their eyes and count to sixty. Meanwhile, the hiders should find somewhere to hide within the boundaries.
Once the jailers have finished counting, they can try to find the hiders.
When a jailer thinks they're near a hider, they should try to catch them by tagging them.
If the hider thinks they’re going to be caught, they can run to another hiding place.
If a jailer catches a hider, the hider must go to the jail area.
Hiders can try to free the other jailed hiders by putting at least one foot inside the jail and saying, ‘escape the jail’. If they succeed, without being caught themselves, the hiders inside the jail are free to hide again.
The game ends when all of the hiders have been caught and are in jail – or when time’s up.
If there’s time, everyone should switch sides and try a different role.
You'll need to set up four areas of this game:
- To create a ‘beach’, safely and securely tie a rope between two trees or objects, such as tables. The beach will be protected by the fierce dragons. Remember to warn everyone about the rope, so they don’t run into it.
- To create a ‘boat’, set up a hoop that’s a suitable running distance away from the rope. You could also have several bases or ‘boats’ dotted around the area.
- To create ‘flares’, put lengths of coloured wool or ribbons in each ‘boat’.
- To create the ‘dragon's den’, set up a coned space somewhere in the playing area. Any survivor caught by the dragons will have to go and stand in the dragon’s den. A survivor can be released from the den if another survivor tags them and sets them free.
Gather everyone in a circle and remember to warn everyone about the rope, so they don’t run into it.
Explain that group of survivors are trapped on a desert island with some fierce dragons. The need to collect some ‘flares’ to signal for help.
When the game begins, survivors run forward to pick up the ‘flares’ from the ‘boats’.
Survivors must run over to a ‘beach’ (rope) then try and tie the ‘flares’ onto the rope to release them. ‘Flares’ must be tied to the rope with a knot, not just draped over the rope. You can also use pegs if people may struggle to tie a knot.
If a dragon catches a survivor by touching them, the survivor must give the dragon any ‘flares’ they're holding. The dragon should take the survivor to the dragon’s den. The dragon then returns the ‘flare’ to the ‘boats’, so they can be collected by someone else.
A survivor can be released from the den if another survivor tags them and sets them free.
Choose three or four people to be the dragons. Their job is to guard the ‘beach’. Find a way to identify the dragons - they could be the players wearing neckers or they could wear a hat. The rest of the group will be the survivors.
The survivors could work as a team to distract the dragons, while someone takes their ‘flare’ from the ‘boat’ to the ‘beach’. People can also run in pairs.
The dragons can also work as a team or in pairs. They could corner survivors, or one dragon could protect the ‘beach’ while other dragons chase survivors.
Players will work out very quickly that it’s better to work together to dodge, protect, distract and attack.
A game will last about 10 to 15 minutes. Everyone plays until either time is up, all the ‘flares’ are at the ‘beach’, or until all survivors have been caught by the dragons.
To make the game easier, you could move the ‘boats’ nearer the ‘beach’. Pegs are a good way to fix the ‘flares’ if people find knots tricky.
In a large space, split into three teams: the coastguards, the smugglers and the pedlars.
Decide what you’ll use for treasure, such as bouncy balls, coloured counters or pretend coins.
Give each team a box or hoop to put their treasure in. This’ll be that team's base. Teams can only add or take treasure from their own base.
The smugglers should stand with their base at one end of the playing space. The pedlars base should be placed at the opposite end of the space to the smugglers. The coastguards should stand with their base in the middle of the smugglers and the pedlars.
The aim of this game is for the smugglers to try and get all their treasure to the pedlars’ base. However, the coastguards want to stop them. If the coastguard tags and catches a smuggler or pedlar, the coastguard can put the treasure that the smuggler or pedlar has into their own base.
Tell everyone the ‘treasure limit’. This is the maximum amount of treasure a player can hold at once. This could be one or two counters.
To begin, put all the treasure at the smugglers base.
Smugglers should try to avoid the coastguards and pass their treasure to a pedlar. Once they’ve delivered their treasure to a pedlar (or been caught red-handed by the coastguard) they must return to their base before they can run again. Smugglers can try to help others, for example, by passing on messages or distracting the coastguards.
Pedlars should try to avoid the coastguards when they collect treasure from a smuggler and take it back to their base.
Once a pedlar has taken treasure from one smuggler, they can’t collect treasure from another smuggler on their way back to base, even if they still have some of their treasure limit left. The treasure is safe when it’s back at the pedlar base.
Once a pedlar has put the smuggler’s treasure in their base, the pedlars can continue to collect treasure from other smugglers, one at a time.
Remember, a smuggler can’t add treasure to the pedlar’s base, only pedlars can do this.
Coastguards should patrol the space and try to find and catch smugglers and pedlars red-handed. They can catch a smuggler or pedlar by tagging them. If a coastguard catches a smuggler or a pedlar, the smuggler or pedlar must give all the treasure they’re carrying to the coastguard.
Whoever has the most treasure in their base at the end of the game, wins.
The smugglers and pedlars need to have more treasure in the pedlar base to win or the coastguards need to have more treasure in the coastguard base to win.
It’s possible to play this game without running. You could explain that if the coastguard runs, they’ll alert the smugglers and pedlars, while if the smugglers or pedlars run, they’ll draw too much attention to themselves. Some people may also find it tricky to remember who’s playing what role – you could use bibs or neckers to help people remember the different teams.
The aim of this game is for each team to capture the other team’s flag and take it back to their base.
Divide the space you’re using into two sides. You could use cones, chalk or tape, but make sure it’s something that won’t become a trip hazard.
Use a hoop or some cones to create a ‘jail’ on each side for players who are tagged. The ‘jail’ can be approximately 2m by 2m.
Use a cone to mark a ‘base’ for each team, which jailed players can return to tag after being freed.
Split everyone into two teams and give each team a ‘flag’. The flag could be any bright object, such as a teddy mascot, necker, Frisbee, flag or ball.
Each team must hide their ‘flag’ somewhere on their side of the space without the other team seeing where it’s been hidden.
When the game begins, players should try to capture the other team’s flag. Some players may choose to help defend their own team’s flag, but no one should be standing directly in front of their team’s flag at any time.
If a player’s tagged while on the other team’s side of the space, they’re sent to ‘jail’. This should be the ‘jail’ on the side of the opposing team.
Players can be freed from jail when someone from their own team tags them.
When freed from the jail, the player who was jailed puts their hands on the head and walks back to their own team’s base to tag it with their foot. Once the base has been tagged, they can then start playing again and trying to capture the other team’s flag.
A team wins by capturing the other team’s flag first and taking it safely back to their base. If one team jails all the other team’s players, they can also be declared the winners and retrieve the other team’s flag.
Before playing a wide game
Before playing a wide game, there are some things you need to do to help keep everybody safe, which include:
Boundaries: Setting boundaries with your group of the playing area and where the no-go zones are. For example, inside this could be the kitchen or the cleaning cupboard. Outside this could be roads, dips in the grass, steps, rocks or rivers. You could mark out the boundaries with cones.
Check terrain: Checking the terrain and making sure the game area is free of hazards and suitable for all users, including those using mobility aids. Any unsuitable terrain could be included in the no-go zones to make the game accessible and fairer to everyone playing.
Have adult supervision: Make sure you’ll have enough adult helpers to have suitable supervision. Tell everyone where adults will be around the site and what to do if anyone needs help. Remember to always follow the Yellow Card.
Have a base: Always have a memorable ‘base’ spot where at least one adult will always be present. This could also be an area with drinks or space to take a break.
Pair up if in public: If playing in a public space, making sure young people are paired up, so no young person is left alone. They should run, hide, play or move together.
Give clear instructions: Explaining the rules of the game clearly and tell everyone how long the game will go on for. You could have a demonstration or a practice round. Make sure all young people and adults involved know how to take part safely.
Have a way to emergency stop: Having a clear way to communicate that the game must stop when needed. This could be a long blow on a whistle.
Respect the space: Reminding everyone how they can use the space respectfully, without disturbing the wildlife if you're outside or other people enjoying the site if you're in a public space.
Behaviour during the game: Making sure everyone understands what contact is acceptable, and monitor contact throughout the activity.
Have a risk assessment and InTouch process in place: All Scout activities must be safely managed. You need to complete a risk assessment and take appropriate steps to reduce risk. You can use the safety checklist to help you. Always get approval for the activity and have an InTouch process in place.
Take a look at our advice on running active games safely and accessibly.
Making games accessible
Make sure there’s a way to include everyone in this game or activity. If anyone doesn’t feel comfortable playing the game or taking part in the activity, give them the opportunity to take on another role instead. Some examples are timing the games, scorekeeping, playing or stopping music, or refereeing.
For anyone who may not be able to hear the activities, consider printing them a version on paper that they can read at the same time. You could also provide written instructions electronically to allow use of magnification software. Try to use size 12 font and either ‘Arial’ or ‘Nunito Sans’, as this is easier for lots of people to read.
Take time and have patience while telling everyone what to do. Give short instructions clearly and concisely. If you need to, pause, then repeat the same instruction using the same words.
Remember to keep instructions short and precise and be prepared to repeat these. It’s best to break information up into smaller 'chunks', so the person doesn’t feel overwhelmed. You can check for understanding by asking questions, such as ‘What do you need to do first?’.
You could have a practice round of the game to make sure everyone knows what they’re doing. Let young people help explain to each other what to do, too.
Remember when giving instructions, some people may not look at you or make eye contact. This doesn’t mean they're not listening. Eye contact can be painful for some people and shouldn't be forced.
If a player has difficulties communicating verbally, you could explore doing this activity without speaking. Remember not to speak for a young person but help them to develop their communication. For example, a closed choice can be easier to make than an open question.
If a young person mis-says a sentence, you could repeat it after them in the correct form - this will help them learn for next time and is much more useful than saying what they said is wrong or ‘correcting’ them.
Adapt the throwing and catching activities, so that they’ll work for everyone in your section. For example, you could use a lighter ball, such as a beach ball.
You can allow people to roll the ball or throw the ball in pairs.
If anyone struggles with fine motor skills, they could use larger materials. You could swap out the items, such as beanbags, for something easier to handle, such as foam footballs.
People could be supported by a friend, an adult volunteer or young leader to pull, push, collect, carry or throw the items. Let them work with a partner and they can throw, collect or move the object together.
Remind people it’s about taking part and having fun, not being having the most accurate or best throw.
If anyone needs support in the collecting or moving of objects or tokens, let them work closely with someone else to help them achieve this.
Try to avoid shouting or using whistles. Some people may not understand why you're shouting and could find this distressing, particularly if they're hypersensitive to noise.
During games, make sure individuals who need to can clearly see the person speaking, as they may find it helpful to read lips or body language.
If it’s too noisy and anyone doesn’t like the noise, the person leading the activity can remind everyone to be quieter. You could provide ear defenders for the person to wear.
You could have a noise level warning system to let everyone know when it gets too loud, allow people to take noise breaks, and shut external doors and windows to help reduce noise.
To take part in a noisy activity, a young person with a hearing impairment might find it more comfortable to turn their hearing aid off. If this is their regular practice, you'll need to make sure that it's turned on again afterwards.
A lot of these games can be played sitting or standing, either on the floor or on chairs. Make sure to adapt to whichever way works best for everyone and make sure any actions are things everyone can do.
Choose an area that’s suitable for all members of your group. You could visit the area early and remove any large or obvious obstacles. Think about the space you’ll be in and the equipment you’re using in advance to make sure it’s accessible to everyone in the group, including wheelchair users.
The equipment and circle should be laid out in a way that’s accessible to everyone, so making sure there’s access for everyone to move round the outside of a circle.
You should think about how everyone moves around the space and the actions they've to perform.
Everyone can move around the space in whatever way works for them, whether that's walking, staying still or running.
Some people may choose to guard a den or take on a more stationary role.
You could think about how people are tagged. If people may struggle to tag each other, or may be uncomfortable or sensitive to touch, you could use tag rugby velcro belts and people need to pull off a velcro tag to tag someone.
Some people might not like how it feels to touch some items of equipment. They could wear gloves, or someone else could move or touch the item for them. They could also use another object or utensil to be able to use, touch, put something on or move the item.
If anyone doesn’t want to hold the rope because of how it feels, they could make a handle cover with some fabric or even tie your necker to the rope to hold.
Chat to the person to find out what materials they’d be comfortable holding.
No-one should be forced to touch something they feel uncomfortable with doing, as it may be distressing for them.
Knot tying can be fiddly. Use thicker string and ropes to help make this activity more accessible to those that struggle with fine motor skills.
Pegs are a good way to attach items to a rope if people find knots tricky.
People can work in pairs to tie the knots and someone who is more confident could help support someone who may struggle with the knot tying element.
For anyone who may have a loss of sight, you could think about using larger containers and objects. Remember to have any writing in a clear, large and easy to read font.
If anyone's colour blind, make sure to have distinct colour markers and tokens to help them to tell each one apart.