Wartime weaving
You’ll need
- Scissors
- Rulers
- Glue sticks
- Wool
- Sticky tape
- Cardboard
Remembrance honours people who serve to defend our democratic freedom and way of life. We unite across faiths, cultures and backgrounds to remember the service and sacrifice of the Armed Forces community from the United Kingdom and the Commonwealth. We will remember them.
- We remember the sacrifice of the Armed Forces community from the United Kingdom and the Commonwealth.
- We pay tribute to the special contribution of families and of the emergency services.
- We acknowledge innocent civilians who’ve lost their lives in conflict and acts of terrorism.
Remembrance doesn’t glorify war and its symbol, the red poppy, is a sign of both Remembrance and hope for a peaceful future. Wearing a poppy isn’t compulsory but it’s greatly appreciated by those who it’s intended to support. When and how you choose to wear a poppy reflects your individual experiences and personal memories.
Remembrance unites people of all faiths, cultures and backgrounds, but it’s also deeply personal. It could mean wearing a poppy in November, joining with others in your community on a commemorative anniversary, or taking a moment on your own to pause and reflect. Everyone’s free to remember in their own way or to choose not to remember at all.
- Armistice Day is the 11 November. It marks the armistice agreement that bought an end to the fighting of the first world war.
- People pause at 11am on the 11 November to remember service and sacrifice past and present.
- The national service of Remembrance happens on the closest Sunday to 11 November, which is known as Remembrance Sunday. Each year people gather at the Cenotaph in London and other memorial sites.
- We call the whole period around these dates Remembrance. There are many ways to take part in Remembrance
In 2022, the Royal British Legion remembers the Service of those who work to protect us and our ways of life. Whether in the Armed Forces, Emergency or Civilian Services, past or present, we remember who has served, how they served and why it’s important that we continue to remember them.
Before you begin
- Use the safety checklist to help you plan and risk assess your activity. Additional help to carry out your risk assessment, including examples can be found here. Don’t forget to make sure all young people and adults involved in the activity know how to take part safely.
- Make sure you’ll have enough adult helpers. You may need some parents and carers to help if you’re short on helpers.
Preparing for the session
- Read through the information on how Scouts worked on the land during the first world war so you’re ready to share it with everyone.
- Think about how you’ll show everyone what to do. Will you make an example along with them, or create a larger loom so everyone can see without getting too close?
- Make sure you have enough equipment for everyone to have a set each. If you don’t have enough pairs of scissors or balls of wool, cut the cardboard and wool to hand out.
Chat about history
- Gather everyone in a circle.
- Explain that Scouts helped with farming during the first world war. We’ve included some information on this page to help you explain.
- Everyone should take a few moments to think about what it must’ve been like for the Scouts who helped on farms. Do people think they realised how much of a difference they were making?
- Remind everyone that flax was a really important crop, because it was used to make a tough canvas-like cloth.
- This activity’s all about giving weaving a go and thinking about the Scouts who helped in the first world war.
Make your loom
- Cut a piece of cardboard roughly 15 cm by 20 cm and two strips of cardboard roughly 1 cm by 15 cm.
- Cut one-centimetre-long slits into the large cardboard rectangle along the two short edges, roughly one centimetre apart.
- Leave a gap of roughly two centimetres at each edge and make sure that the slits on the top and bottom line up.
- Glue the two cardboard strips to the large rectangle roughly one centimetre in from the two short edges, at the end of the slits from step two. One should be near the top and one near the bottom of the large rectangle.
- Cut ten 30 cm-long pieces of wool.
- Thread a piece of wool through one slit at the top, over the two cardboard strips and back through the matching slit at the bottom.
- Pull the string taught, leaving a tail of roughly two centimetres at each end (behind the cardboard rectangle).
- Tape the tails to the back of the cardboard rectangle to hold them in place.
- Repeat steps five and six for each slit until your loom has ten strings running from top to bottom, like a ten stringed guitar.
- These vertical strings are called ‘warp’ threads.
Start weaving
- Cut a 60 cm piece of coloured wool or string.
- Start near the top of your loom and thread the string underneath the first warp thread, over the next, and under the one after.
- Keep continuing going over and under the threads, until you reach the other side of the loom.
- Pull the thread through to leave a tail of a few centimetres at the start.
- Start weaving the thread back the opposite way, going under any threads you went over, and over any threads you went under.
- Keep weaving backwards and forwards until you get to the end of your string, leaving a tail of a few centimetres at one end.
- After every few rows, use your finger to push the threads towards the top of the loom so they sit tightly together.
- Get a new piece of thread, choosing any colour you like, and start weaving again below the first piece.
- Continue until you get to the bottom of your loom. Use as many colours and make as many patterns as you can.
Finished fabrics
- Once you’ve finished weaving, it’s time to take your creation off the loom.
- Remove the tape from the back of the loom and pull the warp threads out of the slits in the top and bottom of the loom. The whole weaving should come away from the loom.
- Tie pairs of warp threads to each other at the top and bottom of the weaving: tie threads one and two together, three and four and so on.
- You could tie the warp threads to a stick or twig so your weaving hangs from it – tie a piece of thread to the stick as a handle to hang up the weaving.
- Take the tails from the weaving thread and weave them back through a few warp threads before cutting them off.
- You could also fold these behind the weaving and tape them in place if it’s simpler.
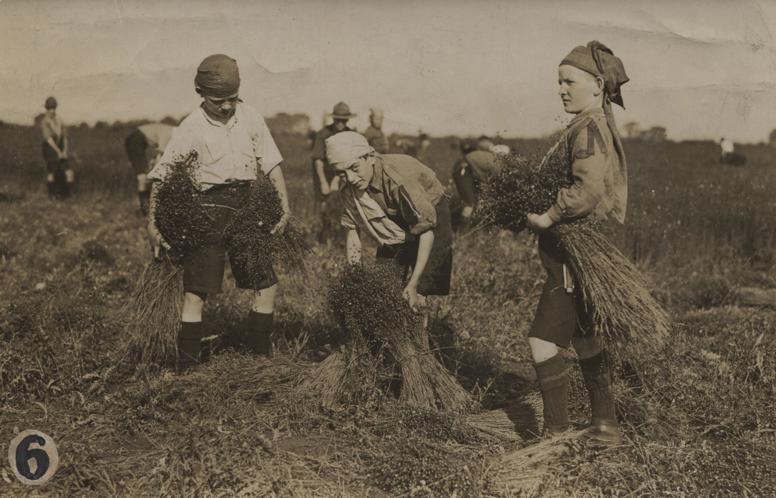
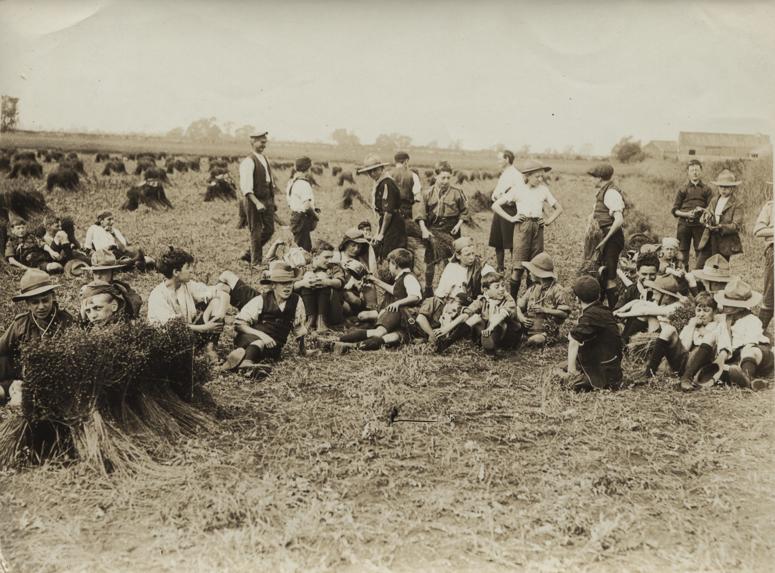
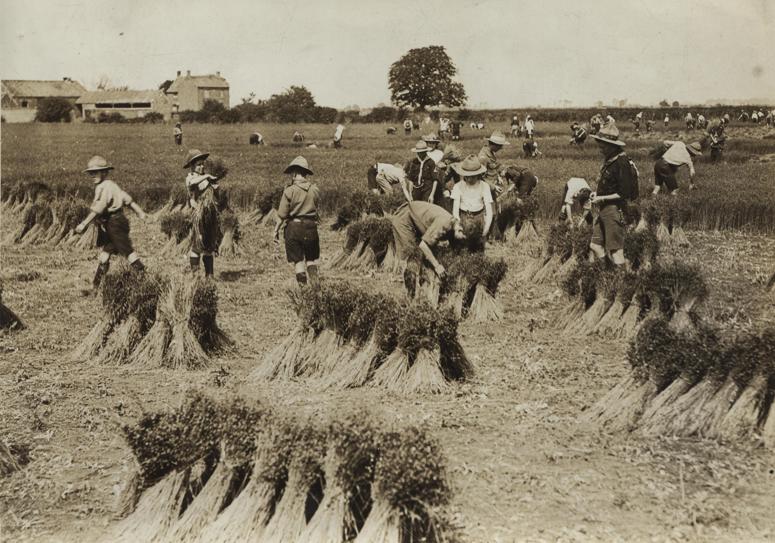
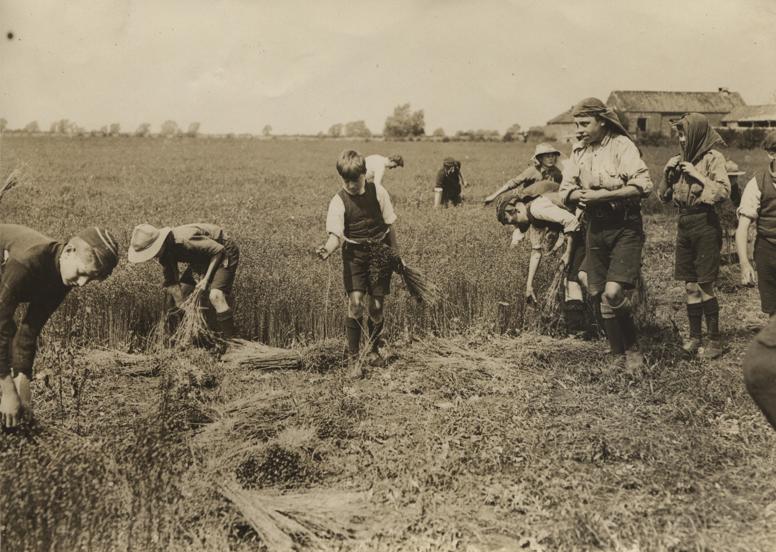
During the first world war, many Scouts volunteered to work on farms. At the time, most farm work was done by hand so lots of men were employed on the land.
When war broke out in August 1914, men started to leave farming to join the armed forces. Scouts took on some of the farm work they left behind, especially during harvest time.
Some Troops from urban areas, such as the St Luke’s Mission Troop from Chelsea, adapted their summer camp into a working farm holiday. In August 1914, some Scouts headed to France to help gather in their harvest as so many French farm workers had joined their army.
Before the war, Britain imported food from all over the world. As the war progressed, German U-boats (submarines) targeted ships bringing food to Britain so it became even more important for Britain to grow more food.
In March 1918, the government approached Robert Baden-Powell, the man who started Scouts, to ask for at least 15,000 Scouts to help on the land.
Food wasn’t the only resource that needed to be grown. Flax was a very important crop because it was used to produce a tough, canvas-like cloth which could be used for jobs such as making tents, equipment, and even covering aircraft wings.
It’s worth remembering that even though only boys could be Scouts during world war one, Guides started in 1910 and they also did a lot of important work to help with the war effort.
Reflection
This activity let everyone try something new. Weaving would have been a particularly important skill during the war to make sure there were enough supplies for the soldiers as well as everyone back home.
People had to learn new skills all the time to support the country any way they could. Think about what great useful skills everyone might have, or what skills they might want to learn.
Learning new skills can take time and patience, but the ability to learn new skills can be a whole skill by itself.
In this activity, everyone thought about Remembrance and how it links to their lives. What did people find out about Remembrance? How did it make them feel? How are people going to take part in Remembrance this year?
Safety
All activities must be safely managed. You must complete a thorough risk assessment and take appropriate steps to reduce risk. Use the safety checklist to help you plan and risk assess your activity. Always get approval for the activity, and have suitable supervision and an InTouch process.
- Scissors
Supervise young people appropriately when they’re using scissors. Store all sharp objects securely, out of the reach of young people.
- Glue and solvents
Always supervise young people appropriately when they’re using glue and solvent products. Make sure there’s plenty of ventilation. Be aware of any medical conditions that could be affected by glue or solvent use and make adjustments as needed.
You can easily scale this weaving activity up or down by making a loom with fewer or more warp threads.
Larger looms may take a lot longer to complete but can have more intricate patterns and designs woven into them.
The size of the loom can be adjusted to make this less fiddly – use whatever string or thread suits everyone.
You could use a blunt needle if it makes it easier to weave the string or thread.
All Scout activities should be inclusive and accessible.
People could make a start on a bigger or more complex loom and take it away to complete in their own time.
If you want to explore Remembrance further and create your own virtual Remembrance event, have a look at A Remembrance reflection.
Encourage young people to choose the design, colours, and patterns to weave themselves. They could also choose whether to create smaller or larger looms.

