Make a campfire biscuit
You’ll need
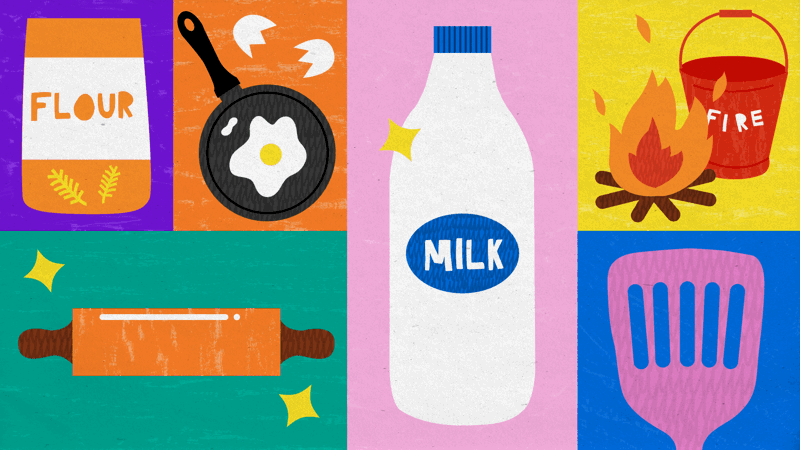
- Tinder (for example, cotton balls and petroleum jelly)
- Kindling (for example, small sticks)
- Firewood
- Buckets
- Access to water
- Bowls
- Spoons
- Kitchen scales
- Ingredients (see recipe)
- Rocks or bricks
To watch in full screen, double click the video
Before you begin
- Use the safety checklist to help you plan and risk assess your activity. Take a look at our guidance to help you carry out your risk assessment, including examples.
- Make sure all young people and adults involved in the activity know how to take part safely.
- Make sure you’ll have enough adult helpers. You may need some parents and carers to help if you’re short on helpers.
- Check for allergies, intolerances, fasting, food-related medical conditions, eating disorders, food sensitivities or dietary requirements, then adjust the food items used as needed. This may include making sure there’s no cross-contamination of packaging and no cross-contamination during the storage, preparation, cooking and serving.
- You may need to use separate chopping boards, equipment and utensils, such as tongs or toasters, for different dietary requirements, allergies and foods.
- If you’re unsure, check with the young person and their parents or carers. You can check with the adult directly if it’s a volunteer or helper.
- Some people may not like certain food textures or tastes and that’s OK. People don’t need to use all the ingredients if they don’t want to, and no-one should be made to try foods if they don’t want to. You can try to find an alternative for them.
- Take a look at our guidance on food preparation.
- You could run our kitchen hygiene activities before this session.
- Always have a hand washing station, washing hands regularly throughout this activity, and taking extra hygiene precautions when handling food. If you're using gloves to prepare food, treat them like your hands. Wash any gloves before using them and in between if necessary.
- Spray and wipe down all working surfaces and tables with anti-bacterial spray before and after use, and wash any equipment you’re using in hot soapy water.
- Take extra hygiene precautions when handling raw meat, such as regular hand washing.
- Keep raw and ready-to-eat foods separate, having separate equipment for raw and cooked meat, and washing up equipment as soon as it's been used.
- Make sure food is properly cooked before you serve it. Always cut through poultry and meat to make sure it's fully cooked, especially when barbecuing food. Make sure it's cooked slowly and thoroughly, and not just done on the outside.
- Always follow cooking instructions and never use food past its use-by date.
- Keep food out of the fridge for the shortest time possible.
- At the start of this activity, remind everyone of kitchen or indoor cooking safety rules and how to act safely. Always tie hair back, tuck in neckers and loose clothing, and wear closed toe shoes. Take a look at our kitchen safety tips.
- You may want to run a demonstration on how to use the equipment safely, such as for cooking or chopping ingredients. You could use our kitchen safety activities before this session.
- Make sure any cooking equipment or heat sources, such as ovens and hobs, always have adult supervision, including during free time and arrival times. If anyone struggles with sensing danger, you should consider providing extra adult supervision. This could be especially helpful at unstructured times, such as breaks or waiting to cook.
- Remind everyone to keep their fingers away from any knives. You may want to use blunt, child-friendly knives, or you could also have ingredients pre-chopped.
- If you’re using a gas stove, tabletop hob plates or a mini oven, make sure it’s on a stable heatproof surface and in a clear and open area, with plenty of ventilation. Gas appliances and sources can increase risk of carbon monoxide exposure. Take a look at our guidance on different cooking methods and carbon monoxide.
- You may want to put child-safe locks on cupboard doors to prevent access by young people, especially for cupboards containing matches, cleaning products or chemicals.
- People can work in small groups or as a whole group to bake or cook. Each group should have adult supervision.
- You may want to be in groups, but everyone to use the same cooking source, rather than having each group have their own.
- You may wish for groups to make or prepare the ingredients in a wider, more spacious area, then invite each group into the kitchen to cook one at a time.
- Remember the groups not using the kitchen or cooking will still need to be supervised, always following the Yellow Card.
- Make sure you have all the ingredients ready. You may want to pre-chop or pre-measure some activities.
Planning and setting up this activity
- At least one adult should know how to build a star fire.
- Scout Adventures have created a handy video that covers the basics of fire lighting; from preparation and collecting appropriate fuel, setting up the fire ready to light, to lighting and building a fire.
Learn to build a star fire
- Gather everyone together and explain you’re going to learn to make a star fire, then make a biscuit version.
- Explain that won’t be lighting this fire, but we still need to think of all the safety steps.
- Fill the water bucket. As you won’t be lighting this fire, it’s OK to just pretend to do this as you talk about it. Make sure everyone knows that if they were lighting a fire, they must have a full water bucket nearby.
- Gather the materials. The person leading the activity should explain what the different materials are for.
- Find a clear, flat space, away from any trees or bushes.
- Put the rocks or bricks in a circle around where the fire will go. Explain that if the fire were lit, everyone should stay outside this circle.
- Arrange the five logs in a star shape that meets in the centre.
- Put the tinder in the middle of the star, where the logs meet.
- Put the kindling over the tinder in a ‘V’ shape.
- Use sticks to build a tripod over the centre of the logs. Add more twigs and sticks around the tripod to make a cone shape – leave a gap for lighting the tinder.
- Show everyone how they’d light the tinder through the gap. The burning tinder should enable the kindling to catch fire.
Build a star fire
- Ask everyone if they know the three elements needed to start a fire. The three elements are fuel, heat, and oxygen.
- Now ask how people think they’d build their fire so there’s enough of each element. For example, it’s important not to pack the sticks too closely together, so oxygen can still flow through and reach the fire.
- Ask everyone to get into teams of between four and six people.
- Each team should work together to build their own star fire, but without lighting it.
- Once their fire is finished (and it’s been admired) everyone should dismantle their fire and move everything to the side of the space.
Make your backwoods biscuit fires
- Everyone should wash their hands, then get back into their teams.
- Each team should follow the recipe card to prepare all the parts of their backwoods biscuit fire. They should prepare buttercream, biscuit tinder, Flake logs, and pretzel sticks.
- Everyone should follow the recipe card to put their biscuit fires together. They should think about how each part of their biscuit fire matches a part of the real fire they made earlier.
- Once everyone has finished their backwoods biscuit fires, they should eat them.
Reflection
This activity helped you to value the outdoors. Did you enjoy making your fire (and your biscuit fire)? How can we make sure our fires don’t damage or harm the outdoors? What should you do once you’ve finished with a fire? Does sitting around a fire help you feel connected to the natural environment?
This activity also helped you to develop skills. Do you think you could make and light your own fire now? Why is the structure of the fire so important? When else might you need to make a fire?
Safety
All activities must be safely managed. You must complete a thorough risk assessment and take appropriate steps to reduce risk. Use the safety checklist to help you plan and risk assess your activity. Always get approval for the activity, and have suitable supervision and an InTouch process.
- Outdoor activities
You must have permission to use the location. Always check the weather forecast, and inform parents and carers of any change in venue.
- Food
Remember to check for allergies, eating problems, fasting or dietary requirements and adjust the recipe as needed. Make sure you’ve suitable areas for storing and preparing food and avoid cross contamination of different foods. Take a look at our guidance on food safety and hygiene.
- Fires and stoves
Make sure anyone using fires and stoves is doing so safely. Check that the equipment and area are suitable and have plenty of ventilation. Follow the gas safety guidance. Have a safe way to extinguish the fire in an emergency.
- Try building a different type of fire such as a ground fire with a tower or a wigwam fire.
- Get outside to try lighting the star fire and cooking something on it.
Make sure you have ingredients for anyone with dietary requirements, for example, dairy free butter and chocolate, gluten free biscuits, or sweets without gelatine in.
All Scout activities should be inclusive and accessible.


Young people should help with the demonstration – anyone more experienced could help lead it.