Create tin can insects
You’ll need
- Clean items of recycling
- A4 paper
- Coloured pens or pencils
- Something to protect surfaces (for example, newspaper or tablecloths)
- Paint
- Paint brushes
- Scissors
- Craft materials (for example, tissue paper, pipe cleaners, stickers)
- Permanent markers
- Sticks
- Hot glue gun and protective mat
Before you begin
- Use the safety checklist to help you plan and risk assess your activity. There's also more guidance to help you carry out your risk assessment, including examples.
- Make sure all young people and adults involved in the activity know how to take part safely.
- Make sure you’ll have enough adult helpers. You may need some parents and carers to help.
Planning this activity
- In the weeks before this session, ask everyone to collect clean items of household recycling, especially food packaging, such as plastic bottles, tins, lids and yoghurt pots.
- Before you begin, make sure to lay down something to protect the surfaces.
Running this activity
- Gather everyone together and ask if anyone knows what upcycling is. Upcycling means repairing or repurposing an item, so it’s a great way to recycle old, damaged or broken items. You can also upcycle items by finding a new way to use them. This means it can still be used and doesn’t go to landfill.
- Ask if anyone can think of any examples of anything that’s been upcycled. For example, someone might add new fabric to a chair, so that it looks newer or is more comfortable.
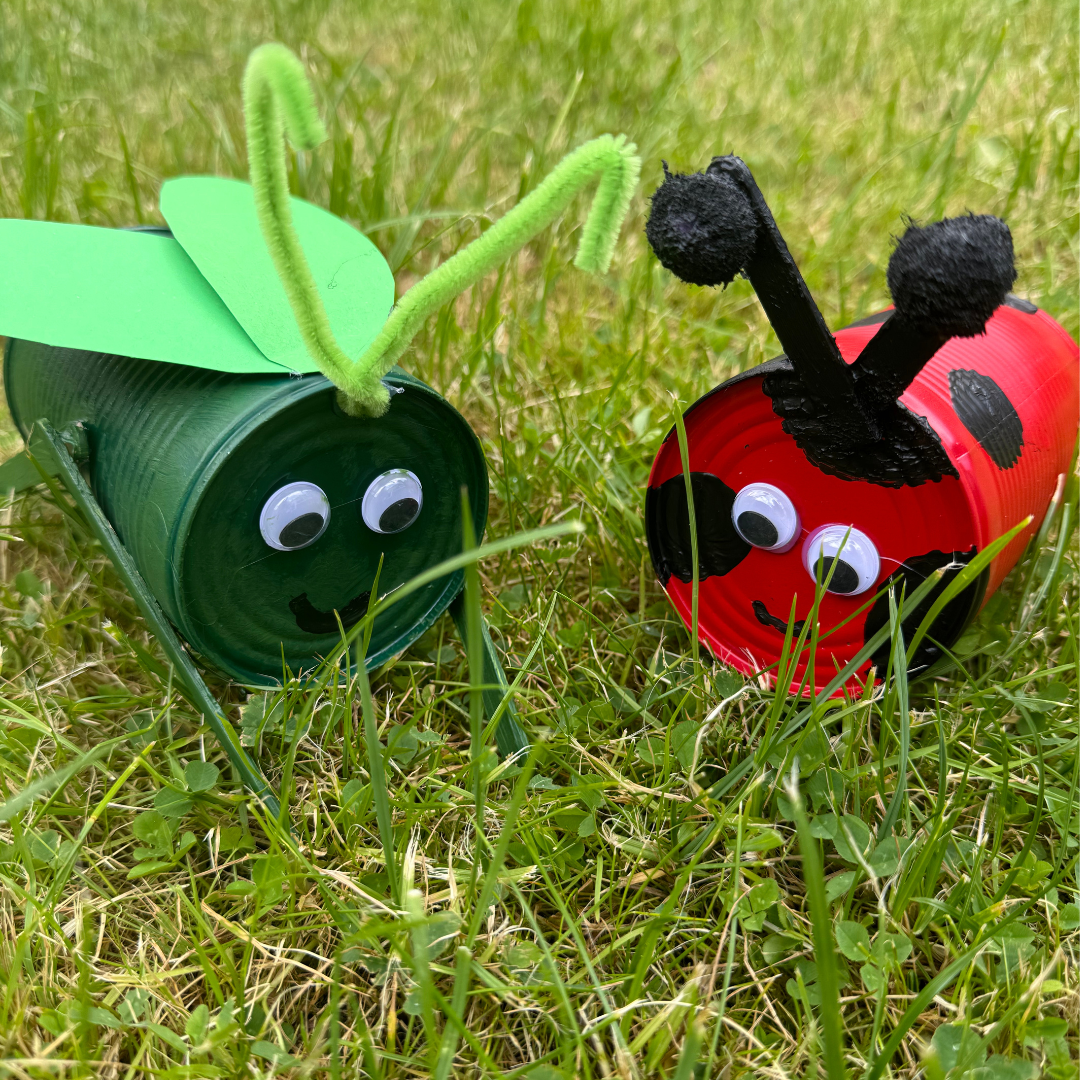
- Tell everyone that you’re going to turn tins and other clean, safe and dry recycling into garden ornaments.
- First, it’s time to plan the design, so hand out paper, pencils and drawing materials. Ask everyone to think about any wildlife or insects they’ve seen outdoors recently, then think about how they can use the tin cans you have to create this. They could think about other items you have, shapes, sizes, colours and textures.
- Next, when everyone’s got their design ready, everyone can start creating their design.
- They could use paint to give all their items a strong base colour that suits their design. While everything is drying, people can start making any other features. When the base layer is dry, people can paint on any details or glue on any craft items too.
- If using a hot glue gun, make sure to have adult supervision or an adult leading the task.
- For example, for an animal you could cut out pieces of plastic to make fins, wings, ears or tails. You could draw stripes or dots on the body of an animal using marker pens, or add antennae by gluing on pipe cleaners or pom-poms.
- When you're finished, you could tie string around your tin. Alternatively, an adult should supervise or carefully help attach one end of a garden stick to the creation using a glue gun. This means it can then be stuck into the ground.
- Now, it’s time to put out your ornaments or take them home.
- Try getting in touch with a local community area and see if they’ve any outdoor space in need of some brightening up. You could also sell your crafts to raise money for a cause you’re passionate about.
Reflection
This activity was all about valuing the outdoors by noticing the beauty in nature and brightening up outdoor spaces and helping your community by finding ways to reuse items that would otherwise be thrown away. Did the group find anything particularly fun or challenging about this crafty activity? Why did they pick that particular animal, plant or element of nature to base their ornament on? The group might have been inspired by the location their ornaments were going to be put in, or maybe they took inspiration from their recycled items and created something with a similar shape to a bottle or tin.
Safety
All activities must be safely managed. You must complete a thorough risk assessment and take appropriate steps to reduce risk. Use the safety checklist to help you plan and risk assess your activity. Always get approval for the activity, and have suitable supervision and an InTouch process.
- Scissors
Supervise young people appropriately when they’re using scissors. Store all sharp objects securely, out of the reach of young people.
- Gardening and nature
Everyone must wash their hands after the activity has finished. Wear gloves if needed. Explain how to safely use equipment and set clear boundaries so everyone knows what’s allowed.
- Sharp objects
Teach young people how to use sharp objects safely. Supervise them appropriately throughout. Store all sharp objects securely, out of the reach of young people.
- Glue and solvents
Always supervise young people appropriately when they’re using glue and solvent products. Make sure there’s plenty of ventilation. Be aware of any medical conditions that could be affected by glue or solvent use and make adjustments as needed.
- Rubbish and recycling
All items should be clean and suitable for this activity.
- Hot tools
Tools, such as irons and glue guns, produce a lot of heat. Never touch the hot metal parts. Use them under adult supervision and on a suitable surface, protecting it if necessary. Never leave hot tools unattended and be careful near combustible materials such as wood, textiles, or paper. Make sure there’s a fire extinguisher and a first aid kit (with items to treat burns) nearby. Always follow the manufacturer’s instructions for proper use. You may need to use gloves and safety goggles with glue guns.
- Anyone that may struggle with choosing a design could be given a design template or images to choose from.
All Scout activities should be inclusive and accessible.
Combine everyone’s ornaments into a community exhibition, which informs people about the impact of food packaging on the environment and how we can tackle plastic pollution. This will also help you work towards steps four and five of your Community Impact Staged Activity Badge.

