Build a bulletin board
You’ll need
- Staves or straight sticks
- Rope, cord or string
- Pins or tin tacks
- Printed notices, including a copy of your programme, the camp schedule and other updates
- Knife or axe
- Wooden mallet
- Hammer and nails, as needed
- Plywood, as needed
- Transparent plastic sheet, if needed
Before you begin
- This activity is best run at the start of a night away, though could also be run at your meeting place if you have permission to install a bulletin board and/or menu stand.
- Since the group is unlikely to need more than one or two bulletin boards, this activity is best run alongside another gadget-making activity. Take a look at Tiny tippy taps or Tripods ten ways for other gadget-making sessions and ideas.
- Assuming your staves (posts) aren’t sharpened beforehand, this activity will involve some work with sharp tools, like knives or axes. This will require confident leaders or helpers to demonstrate the safe use of sharp tools. All leaders and helpers should read the information about the use of axes, saws and knife skills safety advice in Camping and practical skills. Guidance for teaching others to use sharp tools can be found on the Scout Adventures website, while those leading the activity should keep up to date with the latest laws and guidance on carrying knives.
- Get consent from parents or carers for young people to work with sharp tools. If there are objections, an adult or leader will need to complete this part of the activity for the person concerned.
- Consider having a greater ratio of adults to young people than usual.
- Everyone will be having a go at the floor lashing, square lashing and/or diagonal lashing in this activity. Leaders and helpers may wish to familiarise themselves with these knots and have some practice beforehand.
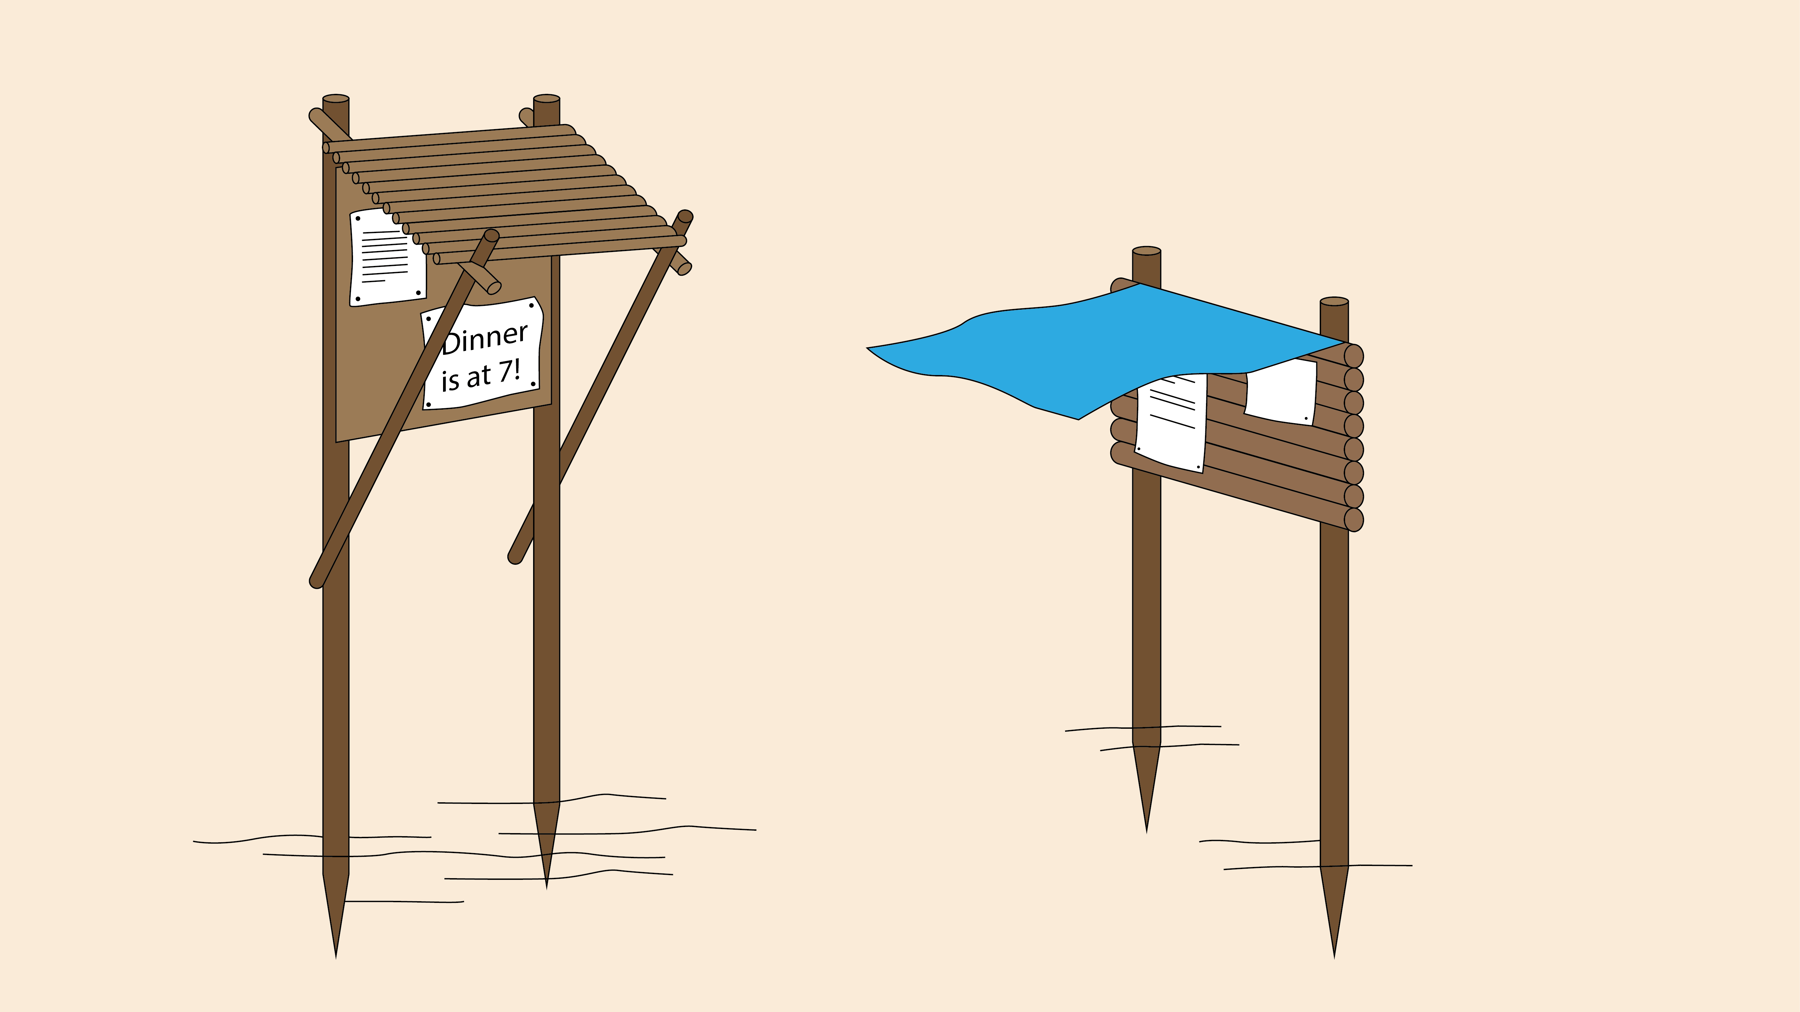
- You can find different images, which show what the board might look like, online. We've included one below, but also take a look at Pioneering Projects Big and Small; a collection of images and ideas collated from across the internet. The steps in ‘Run this activity’ are guidelines for creating something similar to these models with the materials you have available.
Run the activity
- Split into groups for the gadget-making session. A group of no more than five should tackle the bulletin board build, following steps two to nine.
- Gather together the materials listed, using the above picture or a similar one for reference. The group will also need rope or cord for lashing, knives or axes and a wooden mallet.
- Move to an area that’s designated as safe to use sharp tools with two staves and knives or axes. Sharpen the ends of the staves with the sharp tools, if this hasn’t already been done. A leader or helper should be on hand to demonstrate how to do this safely before anyone begins.
This task might involve the use of a pocket knife, fixed-blade knife or hand axe. The leader or helper supervising should be comfortable demonstrating how this tool should be used.
- Return the sharpened staves to the area where the bulletin board is being made. If you’re making the board itself from lashed-together posts (as pictured above), secure the horizontal posts together with a floor lashing. If you’re using a ready-made board from plywood cut to size, use a hammer and nail to attach it to your upright staves.
- Someone in the group should find a suitable spot to place the bulletin board. This should be agreed with the person leading the activity and night away.
- Bring the bulletin board to the chosen spot. Drive the sharpened staves into the ground with the wooden mallet, making sure the board stands upright and doesn’t lean too much one way.
- Make the roof section in a similar way to the backboard by lashing posts together to form a surface, using the floor lashing to secure the horizontal posts together with two more staves at either end. Someone will need to hold the roof up to do this. Fix the roof to the ends of the upright staves with a square lashing or diagonal lashing, adjusting to make sure that the roof tilts downward slightly.
- Lash two long staves to the bulletin board’s legs and to the ends of the roof staves with a square or diagonal lashing, so that they point diagonally downward. Two people will probably need to hold the separate parts together in order to do this.
These can be any length, so long as they connect the two. If they rest on the ground, they could even provide a bit of extra support.
- When everyone’s happy with the height and angle of the roof and how the bulletin board sits in the ground, pin up the notices for everyone to see.
- A pair or small group should tackle the menu stand build, following steps eleven to sixteen.
- Gather together the materials listed, using the above picture or a similar one for reference. The group will also need rope or cord for lashing, knives or axes and a wooden mallet.
- Move to an area that’s designated as safe to use sharp tools with two staves and knives or axes. Sharpen the ends of the staves with the sharp tools, if this hasn’t already been done. A leader or helper should be on hand to demonstrate how to do this safely before anyone begins.
- Return the sharpened staves to the area where the menu stand is being made. If you’re making the stand itself from lashed-together posts (as pictured above), secure the horizontal posts together with a floor lashing. If you’re using a ready-made board from plywood cut to size, use a hammer and nails to attach it to your upright staves.
- Someone in the group should find a suitable spot to place the menu stand. This should be agreed with the person leading the activity and night away.
Remember that the stand doesn’t have a roof, so wherever you put it should be weatherproof, or the board should be placed undercover in the mess tent. If you have a transparent sheet of plastic, you could pin this over your menu to weatherproof it.
- Bring the menu stand to the chosen spot. Drive the sharpened staves into the ground with the wooden mallet, making sure the stand stays upright and doesn’t lean too much one way.
- Pin up your meal plans for everyone to see.
Reflection
Constructing these campsite gadgets involves a great deal of cooperation and careful communication as the group works together to hold posts in place and make necessary adjustments. While these boards may seem simple, they can be very challenging to put together if people don’t communicate properly and get impatient.
Why not challenge the groups to only use positive language during this task? For instance, banning the words ‘no’ or ‘bad’. A statement might look like this: ‘we’re almost there, let’s make some changes here...’ rather than ‘no that’s not right!’. It’s surprising how much negative language can hinder everyone’s learning and make people less willing to take part.
Safety
All activities must be safely managed. You must complete a thorough risk assessment and take appropriate steps to reduce risk. Use the safety checklist to help you plan and risk assess your activity. Always get approval for the activity, and have suitable supervision and an InTouch process.
- Outdoor activities
You must have permission to use the location. Always check the weather forecast, and inform parents and carers of any change in venue.
- Poles and long objects
Be careful when moving poles or long items. Take care if the ends are sharp. Have appropriate supervision for this activity.
- Heavy and awkward objects
Never lift or move heavy or awkward items alone. Ask for help or, if possible, break them down into smaller parts.
- Sharp objects
Teach young people how to use sharp objects safely. Supervise them appropriately throughout. Store all sharp objects securely, out of the reach of young people.
- Rubbish and recycling
All items should be clean and suitable for this activity.
Using ready-made backboards made from plywood hammered on with nails will make this gadget-making session quicker and easier.
Tying knots and lashings can be hard work for anyone. Leaders should encourage those who aren’t confident or comfortable with their lashings to help support the project in other ways by holding posts in place and helping to make adjustments.
One way to help make sure everyone stays focused and engaged would be to have people switch around their roles, so that no one person spends all their time on one type of task.
All Scout activities should be inclusive and accessible.

If everyone has enjoyed working on these campsite gadgets, then why not think about pursuing some more ambitious projects? Or, put your pioneering skills to the test with Tripod ten ways.
Young people take ownership of their campsite by shaping the environment around them at the start of their nights away experience.